Getting to know your Pump
Your dispenser's pump is a very simple mechanism, made from a small number of parts. For this reason, it's very unlikely that your pump will completely fail through normal operation.
This guide will help you understand how your pump works, how to maintain your pump and troubleshoot any problems.
Basic Parts of the Pump
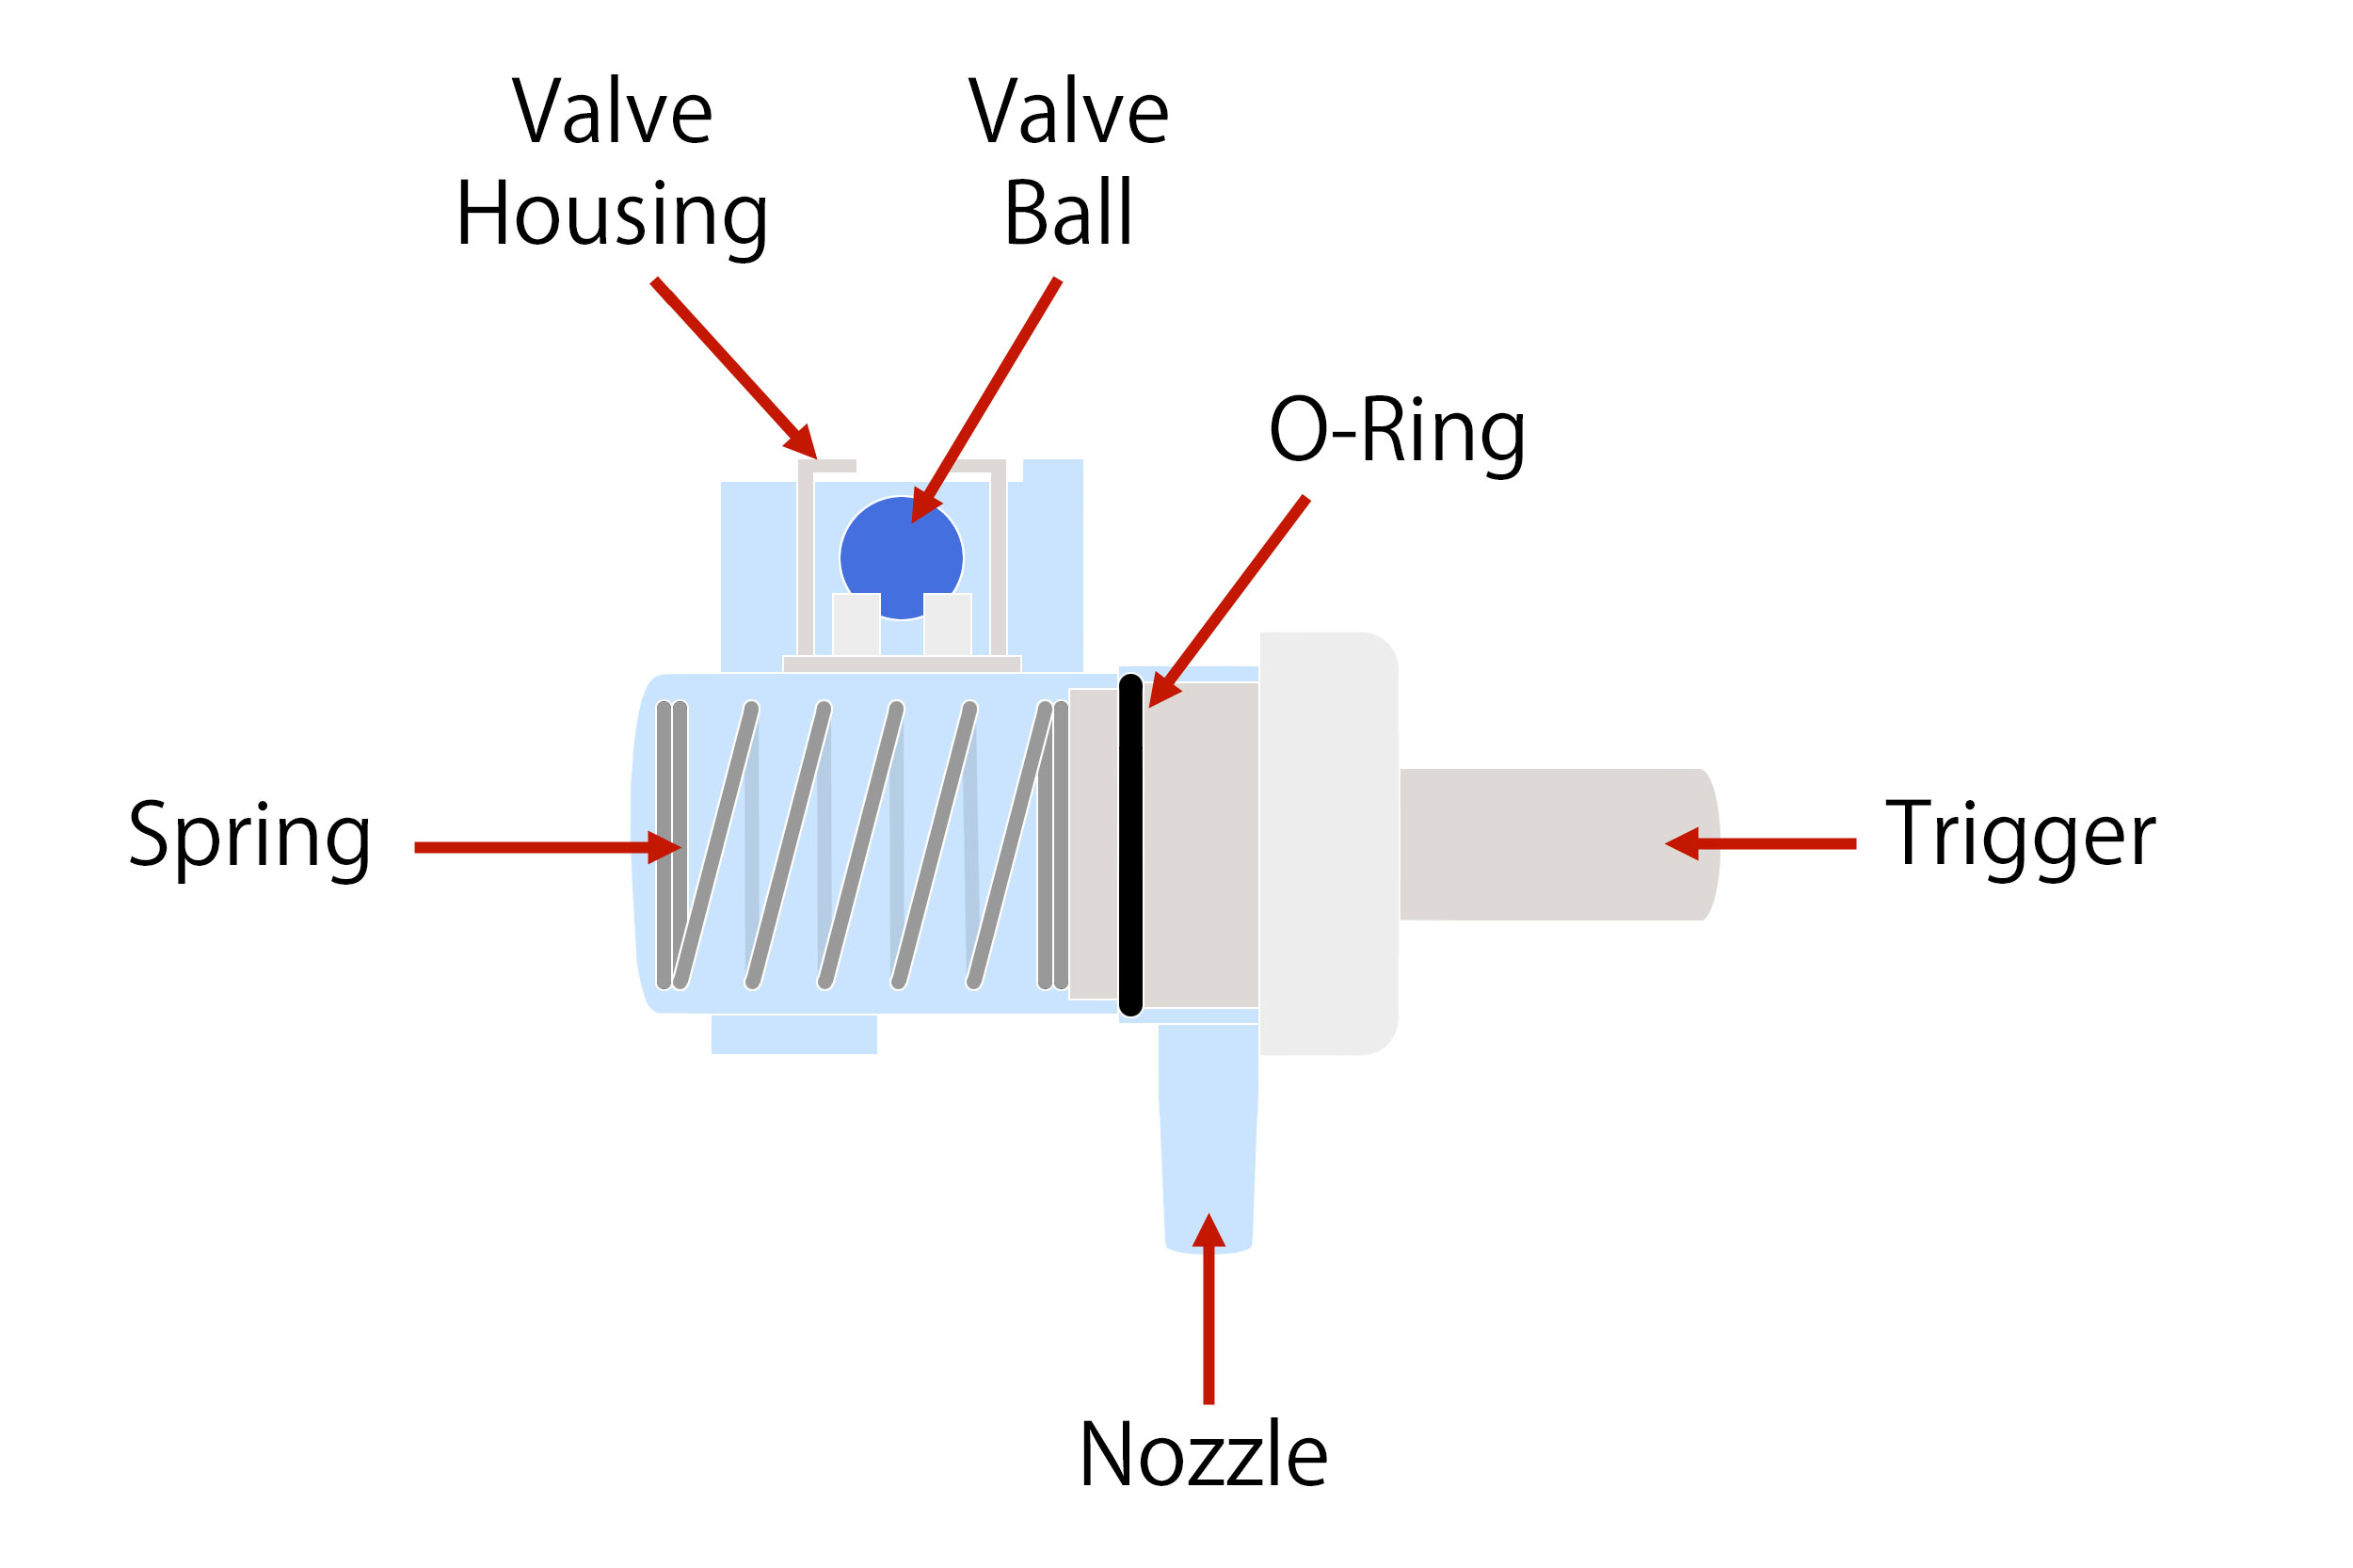
| Trigger | Hidden behind your dispenser's button, the trigger is used to operate the pump. |
| Spring | Upon release of the trigger, the spring returns it to its original position. |
| O-Ring | This seals your pump's nozzle from liquid already in the pump, preventing it from dripping through the nozzle when not in use. |
| Valve Housing | This sits within the neck of your chamber and holds the valve ball in place. |
| Valve Ball | When the trigger is pressed, liquid in the pump forces the valve ball up to the top of its housing, causing the pump to be sealed off from the chamber. When the trigger is released, the ball drops, allowing liquid to be drawn in to the pump reading for dispensing the next time the trigger is pressed. |
| Nozzle | On release of the trigger, liquid is dispensed through the nozzle. |
Pump Maintenance
Overtime some liquids (usually the conditioner) can start to congeal and slow down or stop the pump. This can be rectified by simple routine maintenance.
It is recommended that you rinse your pump and valve thoroughly with warm water regularly. A good habit is to do this whenever you refill your dispenser.
Regular maintenance will ensure your dispenser will always operate effortlessly, and liquids will be dispensed as efficiently as possible.
- Remove the pump from your dispenser and valve from the neck of your dispenser's chamber.
- Flush both thoroughly in warm water until the pump and the valve are clean and water runs through both freely.
- When dry, shake the valve. The ball should move around freely. If you hear a rattling sound, this is perfectly normal.
- Insert the valve back into your dispenser's chamber neck, and reattach the pump
- Prime your Dispenser
Troubleshooting your Pump
Under normal operation, and with regular maintenance, your pump will last a lifetime. There are only a few things that can go wrong with your pump, so finding a solution is easy.
| Appearance | Behaviour | Cause | Solution |
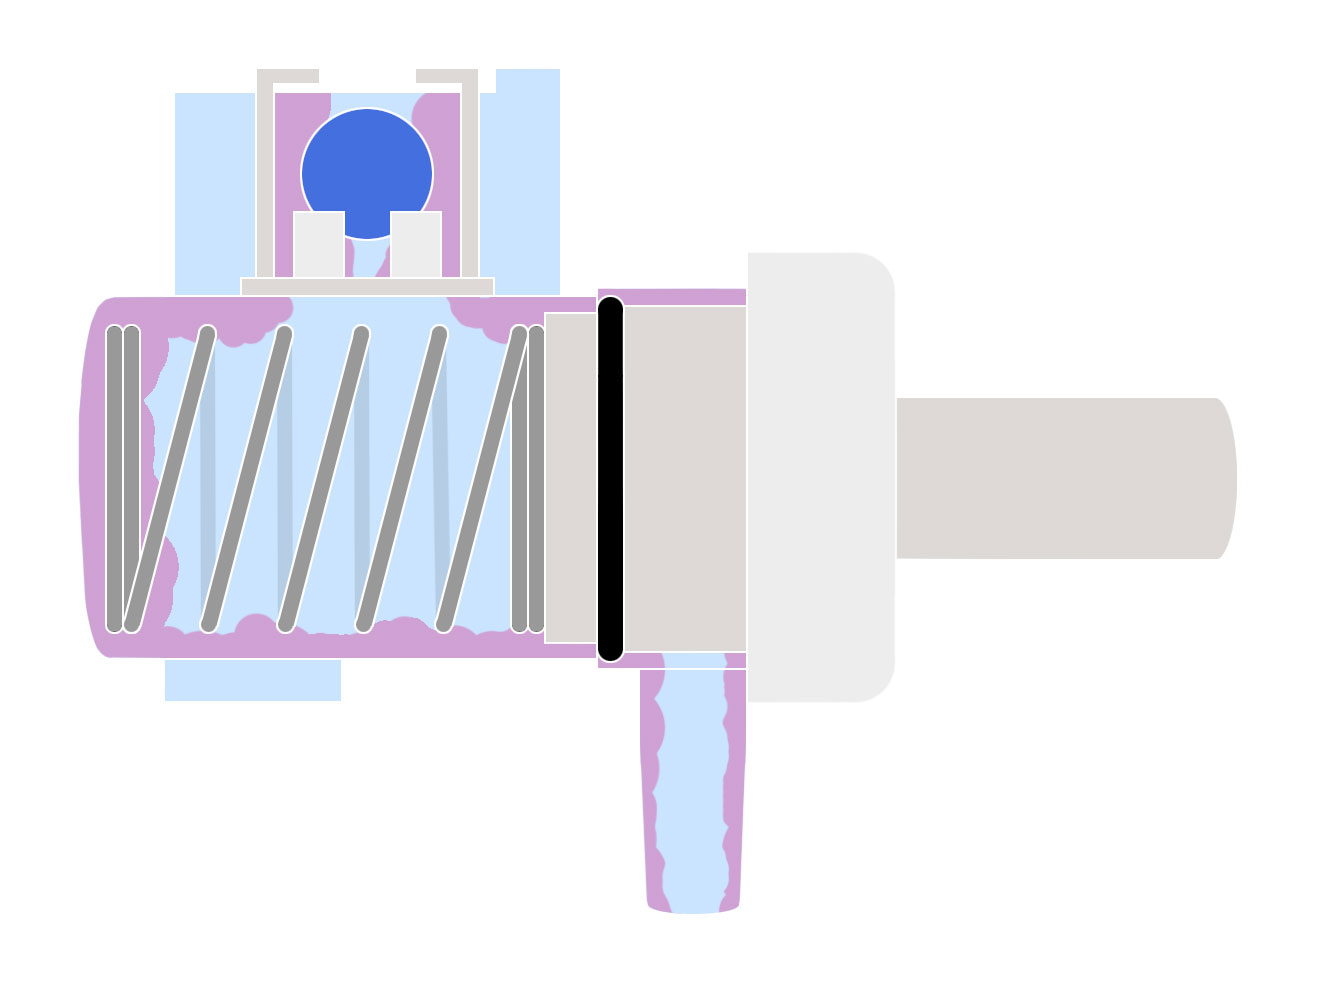 |
The pump is difficult to operate. Little or no liquid is being dispensed. |
Over time, some liquids (usually conditioner) can start congealing. This can slow, or even block, the flow of liquid through the pump. Often customers then try to operate the pump with a much stronger push of the button than is necessary, leading to further, irreparable damage. | This problem is easily fixed. Simply follow the Pump Maintenance procedure above to rinse both your pump and value. |
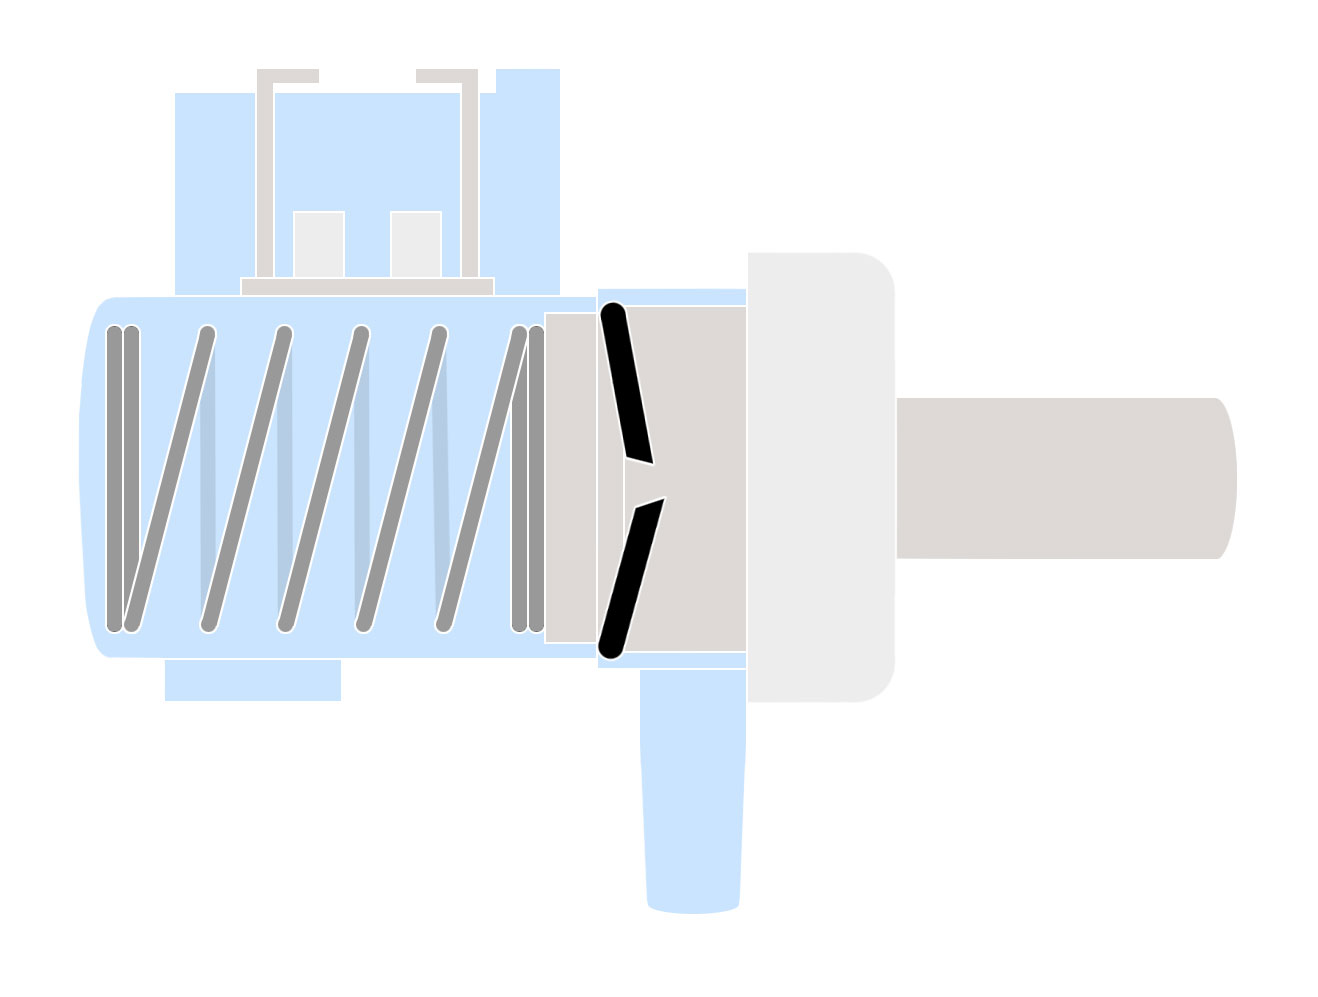 |
Liquid is leaking from the nozzle. The pump is not operating at all. The valve ball is found in the liquid within your dispenser. |
Operating the pump with a much stronger push of the button than is necessary, can lead to the O-ring being dislodged or snapped. | Unfortunately, this damage is not covered by your pump's warranty and a new pump and valve will need to be purchased. |
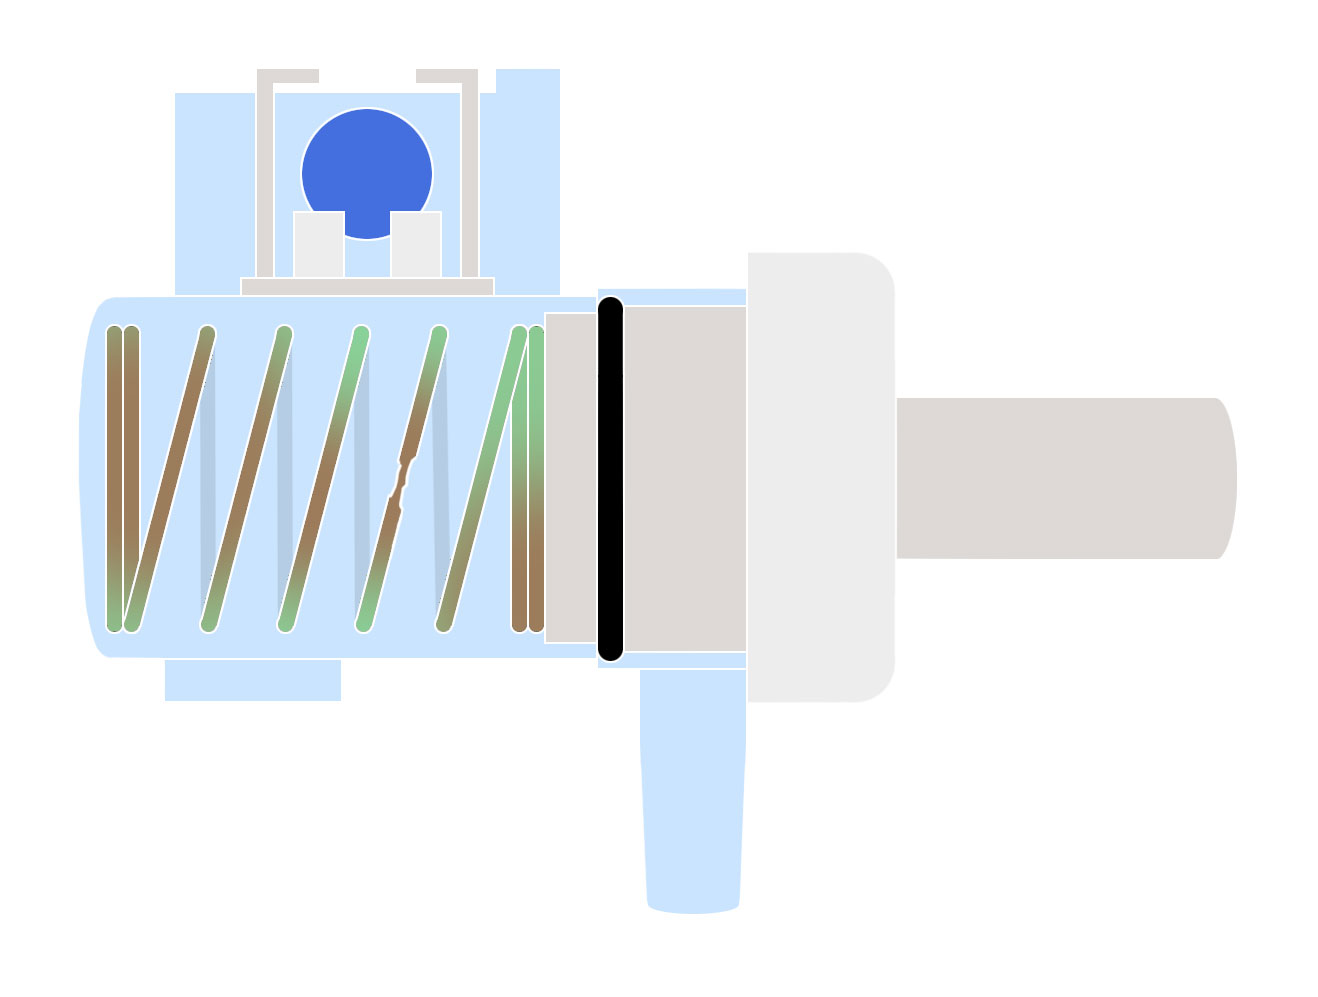 |
Pump does not operate. Button can be pushed in but doesn't quickly back out. Little or no liquid is being dispensed. |
Over time, some liquids can have a corrosive effect on the stainless-steel spring within your pump. This corrosion may appear as a green or reddish-brown discoloration on the spring, and if left to continue, may weaken the spring and possibly cause a breakage. | We will replace your pump, free of charge, under its Limited Lifetime Warranty. Please note, postage and handling charges will apply. Also follow the Pump Maintenance procedure above to help alleviate this problem from reoccurring in the future. |